Tag Archives: healthy food

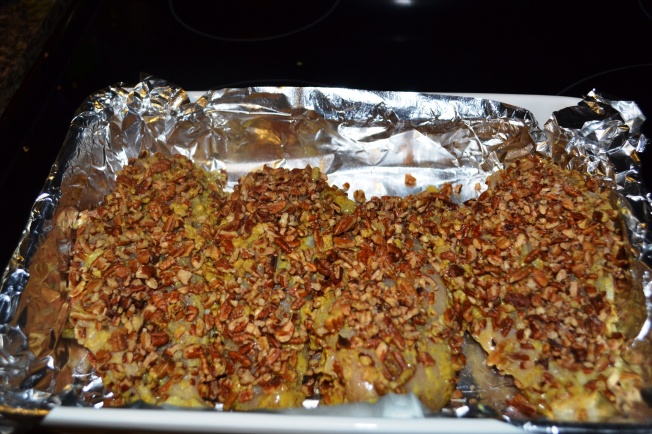
Pecan Crusted Chicken

Standard

Let me start by saying eating clean is going better than I thought it would. I feel healthier and have lost about 6 pounds over the last 2 weeks. Besides that, I nearly went into shock at dinner last night. We had hamburgers, wrapped in lettuce, and I just assumed that my in-laws were going to have theirs on buns. But, my mother-in-law (who is super sweet by the way) ate hers wrapped in lettuce just like us! We are making progress and helping the whole family to make healthier choices!

The P.E. teacher at the school I work at is leading a wellness initiative for our staff at school. She had sent out a bunch of recipes, but I have no idea where they came from exactly. This is one of those recipes just tweaked a little.

It was really yummy and even received the husband saying of approval of, “I think we should make this again sometime!”


Ingredients:

4 Boneless, Skinless Chicken Breast (organic if you prefer, thin sliced and tenders would work well too just adjust cooking time)

1/2 cup of spicy brown mustard

2 tablespoons of organic honey

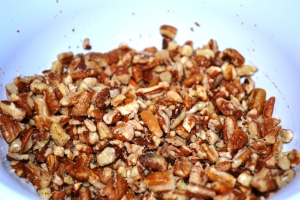
1 cup of crushed pecans (The ones I used were crushed when I bought them)

Sea Salt (optional)


What You Need to Do:

1. Preheat the oven to 350. Line and lightly spray a casserole dish with a healthy oil.

2. Combine mustard and honey in a medium mixing bowl.

Pecan Crusted Chicken

3. Put your pecans in a separate bowl or shallow dish.
Pecan Crusted Chicken4. Set up a cute little assembly line in your kitchen starting with chicken, then mustard mixture, pecans and finally the baking dish

Pecan Crusted Chicken5. Dip both sides of each chicken breast into the mustard mixture. Then dip both sides of each chicken breast into the pecans. Place them into the baking dish and top with a little sea salt if you would like.

Pecan Crusted Chicken

6. Bake at 350 for 45 minutes, serve with a vegetable.

Someone came over to the house, and I have focusing issues and forgot to take a picture of the finished product.

 

Muffin Pan Veggie Quiches

Standard

In the search for new and healthy things to back for lunch, I thought that mini quiches might be an easy and fun thing to throw into my lunch bag. I had seen many recipes on different websites but most had a few things in common: they required a mini muffin pan (which I do not own), they made 48+ servings (I don’t love quiche THAT much and I’m not having a party), they needed 6+ eggs (I only had 3 on hand and didn’t want to run to the store).

I knew that I wanted cute little quiches and I knew that I had lots of veggies, some cheeses, 3 eggs and a regular muffin pan. Thus, this experiment of making my own quiches came to life, and surprisingly they turned out really well. My husband even said, “Those smell really good,” as they were cooking. Of course he followed that up with, “that doesn’t mean they will actually taste good”. After they cooled he had one and said they were pretty good.

This recipe makes 12 quiches. Each quiche is 1 PointsPlus value if you are on Weight Watchers.

Ingredients

1 small zucchini

1/2 cup or more of fresh broccoli

1 small onion

1/4 cup skim milk

3 eggs

1/2 cup grated Parmesan cheese

1/4 tsp baking soda

1 oz reduced fat cheddar, cubed

1/2 Tbs dried basil (or more)

Salt and pepper to taste

12 cherry or grape tomatoes, cut in to halves


What to do:

1. Combine/chop zucchini, broccoli, onion in blender. (I did only these ingredients first, since when they are chopped up they take up less space in the blender making room for all of the other ingredients.)

DSC_0654

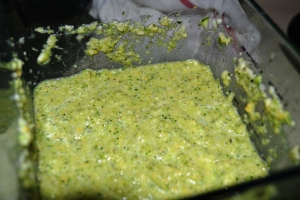
2. To the veggie mixture add in milk, eggs (cracked of course), cheeses, baking soda, basil and salt and pepper.  Blend together until all ingredients are well combined. It should look like the picture below.

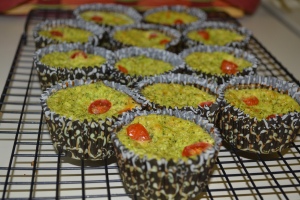
DSC_06563. Spoon mixture into muffin pan, lined with paper liners. Top each mini quiche with tomato. Do not fill all the way to the top as the quiches will rise a little while baking.

DSC_0657

4. Bake at 350 for about 20 minutes, until edges and tops start to brown slightly.

DSC_06615. Transfer to a metal cooling rack. Let them cool a bit before serving.

DSC_0679

You could add in whatever veggies you would like, this is just what I had on hand. I think next time I would like to add in some red sweet pepper.


On a side note: My husband and I recently invested in a Ninja Blender. We purchased it at Costco before the holidays on sale to replace our “cheapest blender they had at the time from Walmart” blender. This Ninja is the best blender I have ever owned. It makes great smoothies, and blends together ingredients for recipes that I simply would have never thought of even attempting with my old blender. It is also much more affordable than the Vitamix.

Clear Out Your Kitchen Veggie Enchiladas

Standard

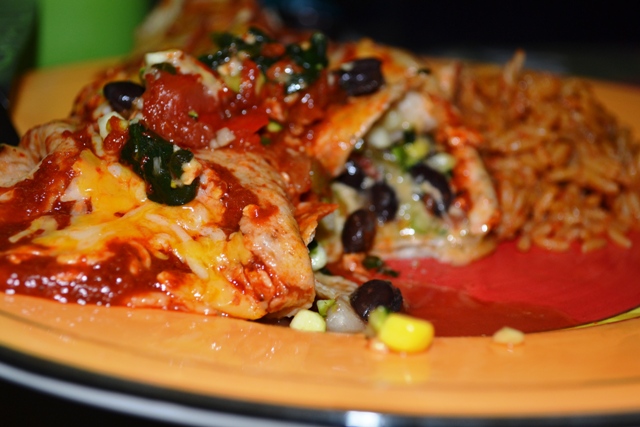
I had the taste for something Mexican, and found a lonely can of Enchilada sauce in the back of the pantry. I searched for recipes and ultimately decided to just do my own thing. Surprisingly, they came out fantastic!

Ingredients:

Olive oil spray

1/2 large onion (diced)

1 zucchini (diced)

1/2 green pepper (diced)

1/2 red pepper (diced)

3 gloves of garlic, minced

ground coriander and ground cumin to taste (about 1/2 tsp of each)

1 cup frozen corn

1 cup frozen spinach

1 can tomatoes with green chiles, drained

1 can black beans

8 whole wheat tortillas

2 cups shredded cheese (I used a mixture of fat free cheddar and reduced fat Mexican blend because that’s what was in our fridge)

1 can of red enchilada sauce
Yes, there are a lot of ingredients, that is why it will clear out your kitchen. I assure you, despite the long list, these were easy to make.

1. Chop/dice onion, zucchini, and peppers. To save time use a food chopper. I suppose you could also use a food processor, but we do not own one.

2. Spray a large pan with olive oil. Add garlic, onion, zucchini and peppers. Cook over medium/high heat stirring frequently for about 3 minutes.

3. Add spinach (mine was partially thawed), corn, drained tomatoes, un-drained black beans and spices to taste. Continue to cook until it is simmering. After this step, the veggie mixture should look similar to this.

4. Line a baking dish with foil to make for easier clean up. Take 1 tortilla, sprinkle cheese in the middle, spoon a heaping spoonful of veggie mixture into the middle. Roll up the tortilla and repeat with the remaining tortillas laying them into the baking dish as you go. I ended up with some veggie mixture left over.

5. Using a spoon, spread enchilada sauce evenly over the top of the stuffed tortillas. Top with remaining cheese.

6. Bake for 7-10 minutes on 350, until cheese is melted. Decided that one serving is two enchiladas, so 4 servings in total.

I served it with a side of Spanish Rice. Uncle Ben’s microwaveable packages are a life saver!

Most notably, my husband who claims to “hate vegetables” ate these and loved them. I have never seen him eat so many vegetables in one sitting, let alone like it!  The leftovers also made for a tasty lunch.

Sweet and Salty Salad

Standard

Over the weekend, the hubby and I ventured out to Costco. Since it is just the two of us, buying bulk doesn’t always make sense. However, Costco has a great selection of individually wrapped items, and items that can be easily frozen. With that being said, readers beware, the next week or two may be filled with items that can be purchased at Costco. Oh, and did I mention we spent under $150 (for Hawaii that’s pretty cheap considering we have enough food for over 2 weeks).


This salad is the perfect concoction of sweet and salty. It helps to load you up on veggies, fruits and also adds in protein with the cheese.

Here are the ingredients that I throw together:

Lettuce, any type (I used 50/50 spring mix and baby spinach, about $5 for the huge tub at Costco)

Sliced purple onion (already had on hand and sliced prior to making the salad, also sliced my thumb)

Baby sweet peppers (one of my favorite new foods to eat, and they also sell these at Costco. I cut them all up, keep half in the fridge and freeze half for later)

Goat Cheese (I put about 1 oz in. 2 huge logs of it at Costco is only $6 and it has a great shelf life)

About 1/2 sliced pear (already had this)

Balsamic Vinegar (When eating at home I put it right on the salad, farther down I explain how I make it when packing it)

Montreal Steak Seasoning (optional yet delicious!)


The sweet flavor comes from the pear, and sweet peppers. The saltiness comes from the goat cheese and steak seasoning. My taste buds thoroughly appreciate the blend of sweetness and salt. Best of all, combining the two of them leaves me craving free at the end of the meal.


When I take salads for lunch, I really prefer for them to not be a soggy mess when I eat them. To prevent that from happening, this is how I packed my salad. (I ate my fruit on the side)

Basically, I pack the salad separate, the cheese separate, and then combine the onion, pepper, balsamic vinegar and steak seasoning.

It works out great, and it also ends up smelling really nice. My co-workers who I eat lunch with often comment about how good this salad looks/smells when I pack it. I think the key is those yummy little sweet peppers!

Salad with BBQ Chicken

Standard

A few days prior, I had boiled up some chicken breasts to use for my lunches and dinners throughout the week. There are so many ways to make chicken, and so many things to mix with chicken, I could possibly eat it every day of the week and never get tired of it.

Here are the main ingredients for my salad, lettuce, homemade healthy ranch, chicken mixture:


To make the chicken mixture, I cooked 2 pieces of reduced sodium turkey bacon and set it aside. In the same pan, I cooked some purple onion, added in my shredded chicken and some BBQ sauce, cut up the bacon and threw that in too.  I did all of this the night before (ate half for dinner, and then put half in a container to take for lunch).


The lettuce is self explanatory, and the ranch dressing is just simply so amazing that it deserves its own special post later on.


I kept all of the ingredients separate until it was time for lunch. Then I threw them all together. I really like the ranch with the BBQ, it may be one of my newest favorite flavor combinations.

Will likely not be posting every day during the weekend. I have two 12 year old swimmers from Japan who will be staying with me. Hope they like my cookin’!

Avocado and Tomato Wrap

Standard

This is an easy, yet tasty lunch, especially if you are a fan of avocados. Sometimes, I think this fruit (yes an avocado is a fruit) gets picked on because of its fat content. It’s important to recognize that it is a natural, good kind of fat. I don’t know about you, but I would rather get my healthy daily intake of fat from an avocado than from a bag of chips.
The wraps I use are a low carb, high fiber wrap. I love these wraps because I have never had an issue with them breaking, and I keep them in my fridge. Counting points for Weight Watchers, they are 3 power points. I can also successfully eat more veggies on a wrap than on a sandwich without them falling off.
To begin with, lay your wrap on your plate. Careful not to dirty any more dishes 🙂 Cut 1/4 of an avocado then simply take a fork to it, like this, and mash it.

If it is ripe enough, it should be pretty easy to mash up. When you are done mashing, it should look similar to this:

Next top it with your veggies. Try to keep the veggies toward the center of the wrap. I always use a lettuce, and tomato. The flavors of the tomato and avocado together just simply can’t be beat. I usually add in some red onion, but for some reason I forgot. Spraying/drizzling olive oil is always yummy too. Once your veggies are on, add some salt and pepper. End product should look like this:

To wrap it up I fold in the bottom first, and then each side. If you are packing a wrap for lunch, I recommend using foil to package it. It keeps the wrap wrapped up, and also makes it easy to eat when the time comes.

Serve your wrap with a healthy side, like fruit or carrot sticks, maybe a yogurt. Here’s what my plate looked like. And don’t judge me for using paper plates. The hubby is away and I hate doing dishes, especially by myself.